Contributing to NiBetaSeries
If you are viewing this file on GitHub, please see our readthedocs page for links/images to render properly.
Welcome to the NiBetaSeries repository!
We’re so excited you’re here and want to contribute.
NiBetaSeries calculates betaseries correlations using python! We hope that these guidelines are designed to make it as easy as possible to contribute to NiBetaSeries and the broader Brain Imaging Data Structure (BIDS) community. If you have any questions that aren’t discussed below, please let us know through one of the many ways to get in touch.
Table of contents
Been here before? Already know what you’re looking for in this guide? Jump to the following sections:
Joining the BIDS community
BIDS - the Brain Imaging Data Structure - is a growing community of neuroimaging enthusiasts, and we want to make our resources accessible to and engaging for as many researchers as possible. NiBetaSeries will hopefully play a small part towards introducing people to BIDS and help the broader community.
We therefore require that all contributions adhere to our Code of Conduct.
How do you know that you’re a member of the BIDS community? You’re here! You know that BIDS exists! You’re officially a member of the community. It’s THAT easy! Welcome!
Check out the BIDS Starter Kit
If you’re new to BIDS make sure to check out the amazing BIDS Starter Kit.
Get in touch
There are lots of ways to get in touch with the team maintaining NiBetaSeries if you have general questions about the BIDS ecosystem. For specific questions about NiBetaSeries, please see the practical guide (Currently the main contact is James Kent)
Message jdkent on the brainhack slack
Click here for an invite to the slack workspace.
- Via the Neurostars forum.
This is our preferred way to answer questions so that others who have similar questions can benefit too! Even if your question is not well-defined, just post what you have so far and we will be able to point you in the right direction!
Contributing through GitHub
git is a really useful tool for version control. GitHub sits on top of git and supports collaborative and distributed working.
We know that it can be daunting to start using git and GitHub if you haven’t worked with them in the past, but the NibetaSeries maintainer(s) are here to help you figure out any of the jargon or confusing instructions you encounter!
In order to contribute via GitHub you’ll need to set up a free account and sign in. Here are some instructions to help you get going. Remember that you can ask us any questions you need to along the way.
Writing in markdown
GitHub has a helpful page on getting started with writing and formatting on GitHub.
Most of the writing that you’ll do in github will be in
Markdown. You can
think of Markdown as a few little symbols around your text that will
allow GitHub to render the text with a little bit of formatting. For
example you could write words as bold (**bold**), or in italics
(*italics*), or as a link to another webpage.
Writing in ReStructuredText
This file and the rest of the documentation files in this project are written using ReStructuredText. This is another markup language that interfaces with sphinx, a documentation generator. Sphinx is used on ReadTheDocs, a documentation hosting service. Putting it all together, ReadTheDocs is an online documentation hosting service that uses sphinx, and sphinx is a documentation generation service that uses ReStructuredText to format the content. What a mouthful!
Where to start: issue labels
The list of labels for current issues can be found here and includes:
 These issues contain a task that a member of the team
has determined we need additional help with.
These issues contain a task that a member of the team
has determined we need additional help with.If you feel that you can contribute to one of these issues, we especially encourage you to do so!
 These issues contain a question that you’d like to have
answered.
These issues contain a question that you’d like to have
answered.There are lots of ways to ask questions but opening an issue is a great way to start a conversation and get your answer. Ideally, we’ll close it out by adding the answer to the docs!
 These issues are particularly appropriate if it
is your first contribution to NiBetaSeries, or to GitHub
overall.
These issues are particularly appropriate if it
is your first contribution to NiBetaSeries, or to GitHub
overall.If you’re not sure about how to go about contributing, these are good places to start. You’ll be mentored through the process by the maintainers team. If you’re a seasoned contributor, please select a different issue to work from and keep these available for the newer and potentially more anxious team members.
 These issues are suggesting new features that can be
added to the project.
These issues are suggesting new features that can be
added to the project.If you want to ask for something new, please try to make sure that your request is distinct from any others that are already in the queue (or part of NiBetaSeries!). If you find one that’s similar but there are subtle differences please reference the other enhancement in your issue.
 These issues relate to improving or updating the
documentation.
These issues relate to improving or updating the
documentation.These are usually really great issues to help out with: our goal is to make it easy to understand BIDS without having to ask anyone any questions! Documentation is the ultimate solution
 These issues are reporting a problem or a mistake in the
project.
These issues are reporting a problem or a mistake in the
project.The more details you can provide the better! If you know how to fix the bug, please open an issue first and then submit a pull request
We like to model best practice, so NiBetaSeries itself is managed through these issues. We may occasionally have some to coordinate some logistics.
Making a change with a pull request
We appreciate all contributions to NiBetaSeries. THANK YOU for helping us build this useful resource.
Remember that if you’re adding information to the wiki you don’t need to submit a pull request. You can just log into GitHub, navigate to the wiki and click the edit button.
If you’re updating the code, the following steps are a guide to help you contribute in a way that will be easy for everyone to review and accept with ease.
1. Comment on an existing issue or open a new issue referencing your addition
This allows other members of the NiBetaSeries team to confirm that you aren’t overlapping with work that’s currently underway and that everyone is on the same page with the goal of the work you’re going to carry out.
This blog is a nice explanation of why putting this work in up front is so useful to everyone involved.
2. Fork the NiBetaSeries repository to your profile
This is now your own unique copy of NiBetaSeries. Changes here won’t affect anyone else’s work, so it’s a safe space to explore edits to the code!
Make sure to keep your fork up to date with the master repository, otherwise you can end up with lots of dreaded merge conflicts.
3. Clone your forked NiBetaSeries to your work machine
Now that you have your own repository to explore you should clone it to your work machine so you can easily edit the files:
# clone the repository
git clone https://github.com/YOUR-USERNAME/NiBetaSeries
# change directories into NiBetaSeries
cd NiBetaSeries
# add the upstream repository (i.e. https://github.com/HBClab/NiBetaSeries)
git remote add upstream https://github.com/HBClab/NiBetaSeries
4. Make the changes you’ve discussed
Try to keep the changes focused. If you submit a large amount of work in all in one go it will be much more work for whomever is reviewing your pull request. Help them help you
This project requires you to “branch out” and make new branch and a new issue to go with it if the issue doesn’t already exist.
Example:
# create the branch on which you will make your issues
git checkout -b your_issue_branch
If you are making significant changes to the code, you may wish to setup a local development environment. Checkout the code-server section for one option on setting up a local development environment.
5. Run the tests
When you’re done making changes, run all the checks, doc builder and spell checker with tox. First you will install all the development requirements for the project with pip:
pip install -e .[test]
Then you can run tox by simply typing:
tox
If the checks fail and you know what went wrong, make the change and run tox again. If you are not sure what the error is, go ahead to step 6.
Note
tox doesn’t work on everyone’s machine, so don’t worry about getting the tests working on your machine.
6. Add/Commit/Push the changes to the NiBetaSeries repository
Once you’ve made the changes on your branch you are ready to 1) add the files to be tracked by git 2) commit the files to take a snapshot of the branch, and 3) push the changes to your forked repository. You can do complete the add/commit/push process following this github help page.
7. Submit a pull request
A member of the NiBetaSeries team will review your changes to confirm that they can be merged into the main codebase.
A review will probably consist of a few questions to help clarify the work you’ve done. Keep an eye on your github notifications and be prepared to join in that conversation.
You can update your fork of the NiBetaSeries repository and the pull request will automatically update with those changes. You don’t need to submit a new pull request when you make a change in response to a review.
GitHub has a nice introduction to the pull request workflow, but please get in touch if you have any questions.
NiBetaSeries coding style guide
Whenever possible, instances of Nodes and Workflows should use the same names as the variables they are assigned to. This makes it easier to relate the content of the working directory to the code that generated it when debugging.
Workflow variables should end in _wf to indicate that they refer to Workflows and not Nodes. For instance, a workflow whose basename is myworkflow might be defined as follows:
from nipype.pipeline import engine as pe

myworkflow_wf = pe.Workflow(name='myworkflow_wf')
If a workflow is generated by a function, the name of the function should take the form init_<basename>_wf:
def init_myworkflow_wf(name='myworkflow_wf):
    workflow = pe.Workflow(name=name)
    ...
    return workflow

myworkflow_wf = init_workflow_wf(name='myworkflow_wf')
If multiple instances of the same workflow might be instantiated in the same namespace, the workflow names and variables should include either a numeric identifier or a one-word description, such as:
myworkflow0_wf = init_workflow_wf(name='myworkflow0_wf')
myworkflow1_wf = init_workflow_wf(name='myworkflow1_wf')

# or

myworkflow_lh_wf = init_workflow_wf(name='myworkflow_lh_wf')
myworkflow_rh_wf = init_workflow_wf(name='myworkflow_rh_wf')
Code Server Development
To get the best of working with containers and having an interactive development environment, we have an experimental setup with code-server.
Note
We have a video walking through the process for fmriprep if you want a visual guide. Hopefully the process for nibetaseries is similar enough for the video to be useful.
1. Build the Docker image
We assume you have NiBetaSeries cloned in $HOME/projects.
We will use the Dockerfile_devel file to build
our development docker image:
$ cd $HOME/projects/NiBetaSeries
$ docker build -t nibetaseries_devel -f Dockerfile_devel .
2. Run the Docker image
We can start a docker container using the image we built (nibetaseries_devel):
$ docker run -it \
  -p 127.0.0.1:8445:8080 \
  -v ${PWD}:/src/nibetaseries \
  nibetaseries_devel:latest
or with Docker Toolbox, we can start a docker container with the command:
$ docker run -it \
  -p 192.168.99.100:8445:8080 \
  -v ${PWD}:/src/nibetaseries \
  nibetaseries_devel:latest
Note
If you are using windows shell, ${PWD} may not be defined, instead use the absolute path to your fmriprep directory.
Note
If you are using Docker Toolbox, you will need to change your virtualbox settings using these steps as a guide.
If you want your git configurations inside the container, so you do not need to specify
your email or username, you can add the following option to your Docker command:
-v ${HOME}/.gitconfig:/home/neuro/.gitconfig.
Furthermore, if you do not want to type your password everytime you push changes to
Github, you can store your credentials in a file named .git-credentials.
Github has wonderful instructions to create a personal access token to store
in credentials.
The token just needs access to the repo.
Once you have your API-TOKEN, you can create a file named .git-credentials
with contents that would look like this:
https://jdkent:API-TOKEN@github.com, where API-TOKEN is replaced with your string
of letters and numbers and jdkent is replaced with your github user name.
Finally, to pass .git-credentials to the Docker container, you will add the following option
to your Docker command:
-v ${HOME}/.git-credentials:/home/neuro/.git-credentials
Thus a fully featured Docker command may look like this:
$ docker run -it \
  -p 127.0.0.1:8445:8080 \
  -v ${PWD}:/src/nibetaseries \
  -v ${HOME}/.gitconfig:/home/neuro/.gitconfig \
  -v ${HOME}/.git-credentials:/home/neuro/.git-credentials \
  nibetaseries_devel:latest
If the container started correctly, you should see the following on your console:
INFO  Server listening on http://localhost:8080
INFO    - No authentication
INFO    - Not serving HTTPS
Now you can switch to your favorite browser and go to: 127.0.0.1:8445
(or 192.168.99.100:8445 for Docker Toolbox).
Code-Server Development Environment Features
The editor is vscode
There are several preconfigured debugging tests under the debugging icon in the activity bar
see vscode debugging python for details.
The
gitlens,python, andrestructuredtextextensions are preinstalled to improve the development experience in vscode.
Docker Toolbox Instructions
Once you’ve installed and started Docker Toolbox and made sure it works, we will find the virtualbox application on your desktop.
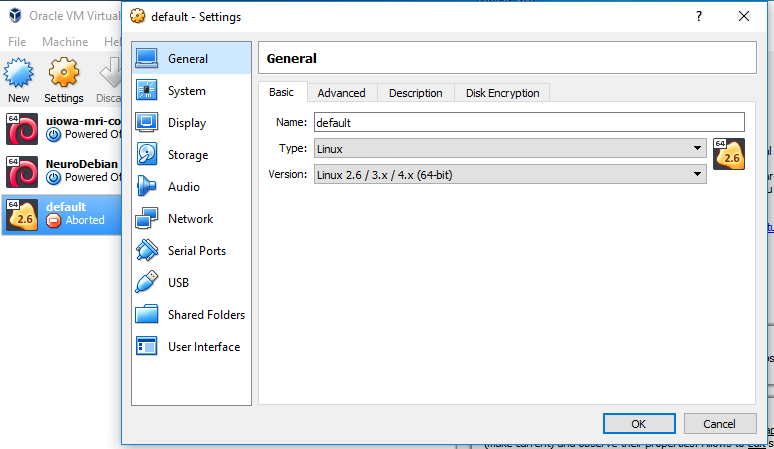
2. Once virtualbox is open, select the “default” box and make sure it is shut down.

Click the gear icon named settings.
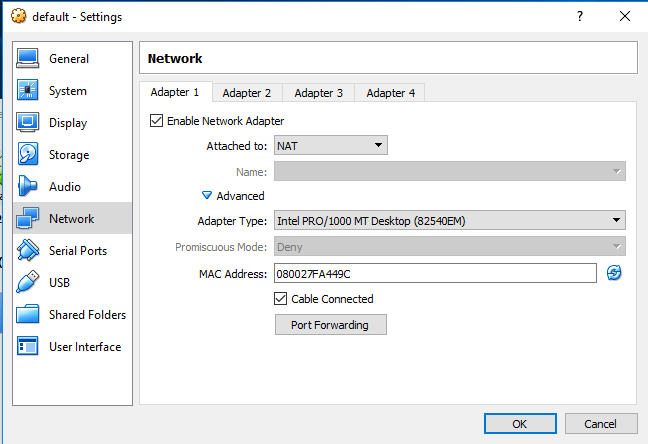
Select Network on the sidebar.

Click the triangle by “advanced” to expand options.
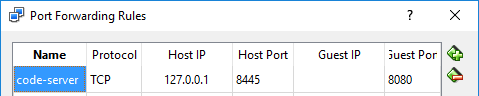
6. Select the port forwarding option and place the
port numbers 8445 in the host port and 8080 guest port.
Name the connection code-server.
7. Click on the quickstart terminal again to restart Docker Toolbox. You can continue following the directions in step 2 in code server development
Recognizing contributions
BIDS follows the all-contributors specification, so we welcome and recognize all contributions from documentation to testing to code development. You can see a list of current contributors in the BIDS specification.